Introduction
Every automotive technician has faced the nightmare scenario: a customer’s vehicle rolls into your shop, exhibiting intermittent electrical issues. Perhaps it’s the dreaded no-start condition, malfunctioning sensors, or intermittent electronic control unit (ECU) errors. Diving into these electrical gremlins can rapidly turn frustrating, costing you hours of lost diagnostic and repair time. Fortunately, leveraging comprehensive Autodata wiring diagrams is an effective approach to swiftly resolve complex electrical diagnostics.
AutoFixData empowers mechanics and garage owners by granting instant, trusted access to leading platforms such as Autodata, AllData, and HaynesPro. These tools provide reliable wiring diagrams and diagnostics data that revolutionize the troubleshooting process, helping your team save significant diagnostic time and enhance customer satisfaction.
Problem Identification
Ask any seasoned automotive technician—from independent garage owners to dealership specialists—and most will admit that electrical diagnostic jobs are among the most challenging and time-consuming work they face. Statistically speaking, according to a recent automotive industry survey, troubleshooting electrical issues can account for nearly 30% of the overall repair time on modern vehicles.
Common diagnostic challenges mechanics face include:
- Unclear or overly complicated wiring diagrams.
- Outdated or inaccurate circuit information.
- Difficulty in interpreting symbols and schematics.
- Spending unnecessary hours tracing wires manually without proper documentation.
The result? Repairs that should take an hour often turn into multi-day endeavors, negatively impacting productivity, profitability, and, ultimately, customer trust.
Technical Background
To diagnose and repair automotive electrical problems accurately, you first need a thorough grasp of electrical schematics and wiring fundamentals. At the core of automotive electrical systems are harnesses, connectors, relays, sensors, and control modules, all intricately wired together.
Autodata wiring diagrams provide a clear representation of these intricate systems, mapping out electrical circuits and clearly identifying components such as:
- Main fuses and related fuse boxes.
- Connectors with identifying pin assignments.
- ECU inputs and outputs.
- Grounds (earths) and associated locations.
- Cable colors and gauge sizes based on OEM standards.
- Voltage measurements or electrical signals expected from sensors and modules.
With clear and accessible wiring diagrams, diagnosing a malfunctioning electrical system becomes a systematic, methodical task rather than mere guesswork.
Solution Overview
Leading diagnostic resources—particularly Autodata—offer complete and accurate wiring diagrams, saving mechanics from manual tracing or inaccurate reference sources. AutoFixData’s integration with these trusted platforms ensures that technicians gain immediate access to OEM-validated, regularly updated Autodata wiring diagrams.
Key features of AutoFixData’s access to diagnostic platforms such as Autodata, AllData, and HaynesPro include:
- Factory-accurate wiring diagrams searchable by VIN or specific make/model/year.
- Interactive circuit tracing features.
- Comprehensive component locator images and testing procedures.
- Detailed connector views and pin references.
- Integrated fault-code troubleshooting tips.
Leveraging these powerful tools, mechanics can rapidly isolate and pinpoint electrical problems, driving down diagnostics time and boosting efficiency.
Step-by-Step Process to Make the Most of Autodata Wiring Diagrams
Step 1 – Identify Vehicle Details Accurately
Always input exact vehicle specifications, VIN, or license plate number before accessing Autodata wiring diagrams. This step ensures the wiring information you receive is correct and specific to your particular vehicle variant.
Step 2 – Find and Isolate the Affected Circuit
Begin your diagnosis by clearly defining symptoms of vehicle faults. Employ error codes retrieved through an OBD-II scanner or initial test results to isolate a general area of focus before pulling up Autodata wiring diagrams.
Step 3 – Analyze Autodata Diagrams Carefully
Begin analyzing the relevant diagram systematically by locating main components of the affected circuit—such as ECUs, control modules, fuses, and sensors. Autodata provides labeled diagrams coded by wire colors and connector numbers, greatly simplifying this analysis.
Step 4 – Utilize Circuit Test Procedures Within Diagrams
Use the detailed testing tips and reference voltage values provided through Autodata’s integrated database to rapidly perform accurate voltage, continuity, and resistance tests on circuits identified as suspect.
Step 5 – Confirm Repairs and Validate Your Work
After completing repairs, return to your Autodata wiring diagrams to verify all components were reassembled in correct order. Perform post-repair diagnostics and functional verification according to Autodata outlined procedures.
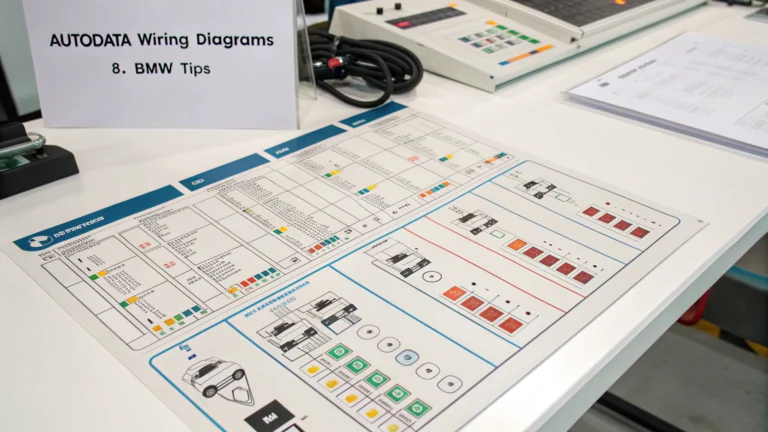
(Visual tip: Include images of Autodata wiring diagrams with callouts highlighting wire colors, connectors, and diagnostic measurement points.)
Common Mistakes to Avoid
While using Autodata wiring diagrams greatly enhances your efficiency, common mistakes can offset these gains. Here are pitfalls to avoid:
- Skipping Initial Vehicle Information Input: Failure to accurately identify the vehicle can trigger misdiagnosis due to incorrect wiring diagrams being referenced.
- Misinterpreting Wiring Colors and Symbols: Always cross-reference wire colors and symbols carefully, as errors here commonly cause unnecessary frustration.
- Ignoring Ground Points: Overlooking grounds or assuming continuity of ground connections can lead technicians down incorrect diagnostic paths.
- Rushing the Testing Procedures: Skipped or incomplete circuit tests commonly lead to incorrect diagnostics and expensive repeat visits.
Advanced Techniques
Professional mechanics often use advanced Autodata diagram features to their advantage:
- Interactive Highlighting: Pro-level software allows users to digitally highlight relevant circuits or components, clearly visualizing the pathway of electrical signals.
- Splitting Complex Circuits: Mechanically advanced professionals divide complex circuit schematics into smaller, logical sections for clarity in troubleshooting.
- Integrated Diagnostic Tools: URL links or embedded references within Autodata wiring diagrams provide immediate access to testing procedures, pinouts, or OE specifications—saving time and effort in complex diagnostics.
Tools and Resources Needed
Effective electrical diagnosis isn’t possible without these essential tools and resources alongside Autodata wiring diagrams:
- Laptop or tablet with internet access to AutoFixData subscriptions.
- Professional-grade Multimeter (DVOM).
- Circuit tester and test leads.
- Reliable OBD-II scan tool or diagnostic device.
- Connector de-pinning tools and terminal test adapters.
Autodata available through AutoFixData integrates seamlessly with these tools, helping you confidently attack any complex wiring diagnostic task.
Real-World Application: A Case Study
Take as an example, a customer recently visiting a shop with a late-model BMW experiencing intermittent sensor faults triggering multiple dashboard lights. Initial basic checks revealed nothing obvious—fuses intact, grounds appeared solid at a glance.
By consulting Autodata wiring diagrams provided via AutoFixData, a technician quickly traced circuit pathways and identified a hidden corroded connector, verified through circuit pin voltage tests outlined in Autodata’s test procedures. Repairs were implemented rapidly, customer satisfaction was high, and the shop owner saved time, money, and much headache, all attributed to strategically using Autodata wiring diagrams.
Conclusion
Automotive electrical diagnostics doesn’t have to be the time-consuming chore it often becomes. By efficiently leveraging the power of Autodata wiring diagrams–clearly presented and conveniently accessible through an AutoFixData subscription—you can systematically diagnose complex electrical issues with confidence and speed.
Mechanics and shop owners seeking reliable data to diagnose vehicles accurately and swiftly should consider AutoFixData’s solutions. Equipped with industry-leading diagnostic data from platforms like Autodata, AllData, and HaynesPro, you’ll streamline diagnostics, bolster customer satisfaction, and drive higher profitability.
Ready to transform your diagnostics game? Sign up today and explore diagnostic solutions from AutoFixData to access comprehensive Autodata wiring diagrams instantly.
FAQs
1. Can Autodata wiring diagrams be accessed without an internet connection?
Autodata diagrams are primarily online-based. However, you can screenshot or print critical diagrams ahead of time for offline, in-shop convenience.
2. How often are Autodata wiring diagrams updated?
Autodata updates its wiring diagrams constantly, reflecting manufacturers’ OE data releases to maintain reliability and accuracy.
3. Are Autodata wiring diagrams specific to each vehicle?
Absolutely. Once you input make, model, and VIN, Autodata ensures diagrams shown match your exact vehicle front-to-back.
4. Is training necessary to use Autodata effectively?
Experience helps, but Autodata diagrams and tools within AutoFixData are user-friendly for mechanics at all skill levels.
5. Can OEM-specific wiring colors be found in Autodata wiring diagrams?
Yes, Autodata wiring diagrams include OEM-specific wire colors and pin assignments, ensuring accurate diagnostics every time.