Introduction: Overcoming Electrical Troubleshooting Challenges with HaynesPro Wiring Diagram
Electrical troubleshooting can be one of the most challenging aspects of automotive repair. Mechanics and garage owners often find themselves spending hours tracing faults in complex vehicle wiring systems. Without accurate and easy-to-read wiring schematics, the task feels daunting and time-consuming. This is where HaynesPro wiring diagrams come to the rescue, offering mechanics detailed, accurate, and user-friendly diagrams to enhance their troubleshooting accuracy and efficiency.
If you’re a mechanic or automotive enthusiast aiming to simplify diagnostic challenges, HaynesPro wiring diagrams (available through AutoFixData) can be your trusted reference. Throughout this guide, we’ll discuss exactly how to access and use HaynesPro wiring diagrams effectively for superior diagnostic outcomes.
Problem Identification: Why Electrical Diagnostics Can be Difficult
Automotive electricians and mechanics commonly struggle with electrical diagnostic challenges because modern vehicles contain increasingly sophisticated wiring systems. Today’s cars have complex electronics including multiple control modules (ECMs, BCMs, TCMs), countless sensors, actuators, CAN networks, and intricate connectivity. As automotive manufacturers introduce new technologies, wiring harnesses become denser, and complexity increases exponentially.
Recent surveys suggest around 40% of vehicle downtime results from electrical and electronic faults. Mechanics unfamiliar with high-quality wiring diagrams can miss key details, misinterpret connections, or spend excessive hours trying to accurately pinpoint issues. As time is money in any automotive facility, these delays add up to significant productivity losses.
Technical Background: Understanding Automotive Wiring Diagrams
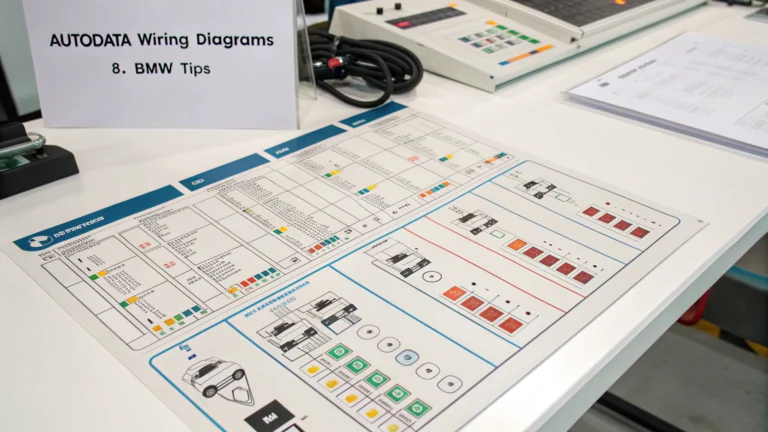
Before diving deeper, let’s quickly clarify wiring diagrams. An automotive wiring diagram illustrates the electrical circuits within a vehicle, clearly representing how wires interconnect components. These diagrams usually include:
- Wiring colors & coding standards
- Connector and pin locations
- Fuse & relay placements
- Switches and modules with identified terminals
- Ground and power distribution circuits
For diagnostic accuracy, precision in wiring diagram symbols is paramount. Technicians rely upon diagrams highlighting correct wire routing, accurate connector locations, and terminal identifications. Any deviations or inaccuracies can lead to confusion, incorrect circuit testing results, and wasted diagnostic time.
Solution Overview: Leveraging HaynesPro Wiring Diagrams Through AutoFixData
HaynesPro wiring diagrams offer a comprehensive visual representation of vehicle electrical systems, vastly improving diagnostic efficiency. Mechanics, garage owners, and automotive enthusiasts can conveniently access HaynesPro wiring diagrams via AutoFixData’s diagnostic platform subscription.
Main Advantages of HaynesPro Wiring Diagrams include:
- Clear, professional-quality diagrams optimized for easy interpretation.
- Regularly updated diagrams reflecting new vehicle information.
- Coverage across virtually all vehicle makes and models.
- Interactive diagrams enabling users to zoom in on specific wiring sections or components.
- Integration with other diagnostic software features like component locations, repair procedures, and fault codes cross-referencing (when accessed via AutoFixData).
AutoFixData integrates HaynesPro diagrams alongside leading diagnostic platforms such as AllData and AutoData, delivering a one-stop solution ideal for any garage or specialist repair technician.
Step-by-Step Process: How to Access & Use HaynesPro Wiring Diagrams
Step 1: Login to Your AutoFixData Account
Access AutoFixData’s website using your login credentials. Make sure your subscription includes the HaynesPro module. If you’re unsure, visit AutoFixData pricing to verify access options.
Step 2: Select Vehicle Make, Model & Model Year
Accurate vehicle identification is critical. Input correct vehicle data, including VIN if possible, to ensure the wiring diagrams returned match the exact vehicle configuration.
Step 3: Navigate to Wiring Diagrams Section
Once vehicle data is entered, locate the “Wiring Diagrams” feature within the HaynesPro module. Diagrams will be grouped by systems, such as engine management, transmission controls, ABS systems, infotainment, lighting, etc.
Step 4: Choose the Relevant System or Component
Select the targeted system you’re diagnosing (for example: fuel injection, charging system, or HVAC). Choosing the right diagram eliminates guesswork and pinpoints the relevant wiring and connectors quickly.
Step 5: Interpret Wiring Diagram Symbols and Tracing Pathways
Use the standardized legend provided by HaynesPro to interpret components, wires, connectors, grounds, and fuses. Trace circuit lines logically to pinpoint potential faults. Zoom features enhance clarity, ensuring precision diagnosis.
Step 6: Verify Connector Details and Identify Testing Points
All connectors come labeled with terminal numbers clearly indicated. Confirm connector appearance and pinpoint precise test locations using HaynesPro’s built-in component locator tool, seamlessly integrated through AutoFixData.
Step 7: Perform Diagnostic Testing and Confirm Fix
Using your digital multimeter or oscilloscope, test continuity, voltage, resistance, and signals according to the HaynesPro wiring diagram. After fault rectification, test again to confirm accurate repair before reassembling vehicle components.
(Suggested visual aid: Include screenshots demonstrating accessing diagrams through AutoFixData and zoomed-in views of clear terminal identifications.)
Common Mistakes to Avoid When Using HaynesPro Wiring Diagram
Many mechanics unknowingly make common mistakes when using wiring diagrams:
- Incorrect vehicle identification: Always double-check VIN and vehicle specification details. Incorrect diagrams waste time and can lead to incorrect diagnostics.
- Misinterpreting standard wiring symbols: Ensure familiarity with universal symbols; reference provided legends if uncertain.
- Ignoring connector labels: Always verify connector numbers and letters meticulously.
- Failure to trace complete circuits: Avoid partial diagnosis—trace pathways entirely from power source to ground to effectively pinpoint failures.
- Skipping module-related diagnostics: Always consider control modules in modern vehicles; testing only wiring without module verification can cause repetition.
Advanced Techniques for Professional Diagnostics Using HaynesPro Diagrams
To elevate your skillset further, harness these advanced diagnostic techniques:
- Load Testing Circuits: Utilize wiring diagrams to identify load-testing points effectively. Circuit load testing reveals underlying faults that simple resistance readings might miss.
- Interconnected Module Diagnosis: Use HaynesPro diagrams to understand module interconnectivity clearly, as CAN networks complexity increases. Understanding data-lines and their correct voltages reduces diagnostic complexity.
- Waveform Analysis via Oscilloscope: Integrate diagrams with oscilloscope testing. Knowing precise connector terminals and wire routing greatly simplifies capturing and interpreting signal waveforms.
Tools and Resources Needed to Optimize Electrical Diagnostics
For effective use of HaynesPro wiring diagrams through AutoFixData, ensure the following resources are available:
- Reliable internet-connected device for AutoFixData platform access
- Professional-grade digital multimeter (DMM)
- Automotive oscilloscope for waveform diagnosis
- Test light for quick circuit validation
- Manufacturer-specific connector breakout boxes (recommended)
- Access to AutoFixData’s full subscription (covering AllData, AutoData, and HaynesPro resources)
Real-World Application: Solving a Mercedes-Benz Charging System Issue
In a real-world automotive repair shop scenario, a mechanic faced an intermittent charging problem in a Mercedes-Benz E-Class (W212). Using HaynesPro wiring diagrams accessed via AutoFixData, the technician was able to quickly trace complex alternator regulator circuits, ECM output signals, and verify correct grounding points. Precise connector and wire identification enabled accurate measurements. Fault was efficiently traced to a corroded connector terminal, demonstrating significant diagnostic time savings compared to traditional manual tracing methods.
Conclusion: Improving Diagnostic Precision & Efficiency with AutoFixData and HaynesPro
HaynesPro wiring diagrams, accessed conveniently via AutoFixData, provide advanced diagnostic tools crucial to modern vehicle troubleshooting demands. Accurately pinpoint faults, drastically reduce troubleshooting duration, and boost workshop productivity and revenue through your AutoFixData subscription.
Ready to revolutionize your automotive diagnostics? Check out our available plans now at AutoFixData’s Pricing Page and empower your garage today.
FAQs: Your Top Questions on HaynesPro Wiring Diagrams Answered
1. How frequently are HaynesPro diagrams updated within AutoFixData?
HaynesPro wiring diagrams are updated regularly, ensuring comprehensive coverage, accuracy, and alignment with manufacturer data.
2. Which vehicles does HaynesPro wiring data cover via AutoFixData?
Coverage is extensive, including American, European, Asian brands—virtually all passenger vehicles, SUVs, and commercial vans/trucks.
3. Can I use HaynesPro wiring diagrams on mobile devices?
Yes, AutoFixData’s platform—including HaynesPro wiring diagrams—can be accessed on smartphones, tablets, and desktop devices.
4. Are HaynesPro diagrams compatible with other diagnostic platforms via AutoFixData?
Absolutely. AutoFixData provides integration with additional diagnostic platforms such as AllData and AutoData.
5. Does AutoFixData provide tutorials or assistance on interpreting HaynesPro diagrams?
Yes, AutoFixData offers extensive guides, videos, tutorials, and customer support to assist users in effectively interpreting and navigating wiring diagrams.